We use cookies to offer you a better experience. For more information on how we use cookies you can read our Cookie and Privacy Policy.
How to Clean a Mechanical Keyboard
November 18, 2018
The prevailing wisdom says a console gamer on a controller could never beat an equally skilled gamer on a keyboard. PC gamers live and die (digitally) by the mechanical keyboard, and for good reason.
When properly maintained, a mechanical keyboard is a versatile digital weapon that allows for a wide range of functions and customizability. For multimedia and business professionals, it’s an instrument of creation.
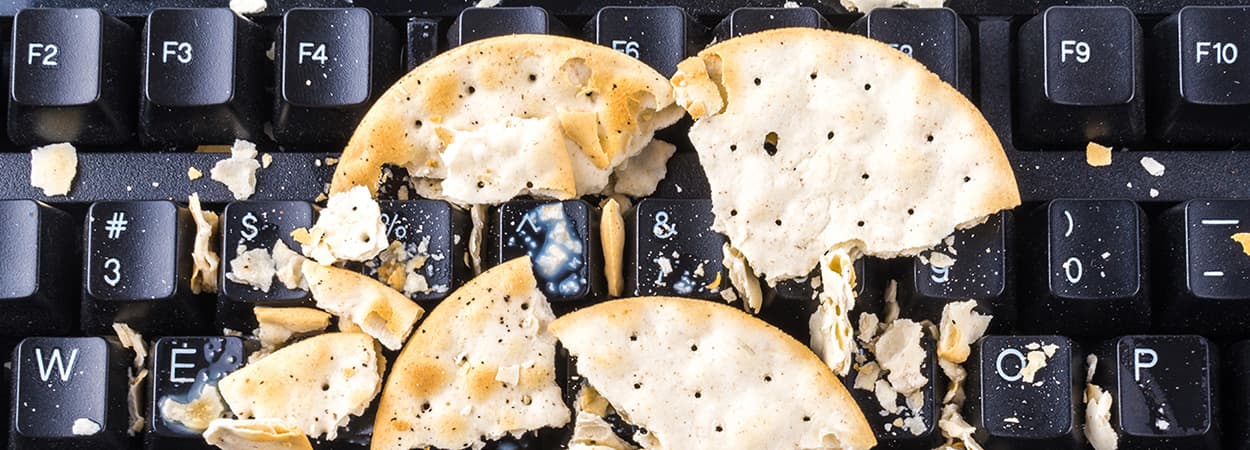
Despite how often our dirty fingers brush the keys, most people tend to neglect giving their keyboard a regular bath - let alone a quick shower. Did you know you should be wiping and sanitizing your keyboard once a week? Most people don’t.
If you’re suffering from unexplained performance slowdowns, or if your previously white keys have turned gray or black, it might be time to clean your keyboard.
Why does a clean keyboard boost gaming performance?
A dirty keyboard will hinder one of its very important functions: responsiveness. Dust and grime can accumulate under the keys and make them stick when you press down on them.
You don’t want to deal with the slowdown of a dirty keyboard. Especially if you’re right in the middle of an intergalactic firefight, or if you’re trying to maintain a fast workflow on that video editing project you need done by Friday. A clean keyboard will ensure that you’re gaming and creating at fast speeds.
What is a mechanical keyboard?
The two most common types of keyboards are mechanical keyboards and membrane keyboards. Mechanical keyboards and membrane keyboards have different builds, and so they require different cleaning methods. This article will primarily focus on the cleaning of mechanical keyboards, but we’ll briefly go over the cleaning of a membrane keyboard.
Before you get started, let's review the key components of a mechanical keyboard and how they function.
Key matrix
The key matrix is a large piece of circuitry at the heart of the keyboard. You don’t need to worry about cleaning the matrix. You won’t be disassembling the keyboard enough to see it, and you should avoid messing with it, anyway.
Keycap
All those buttons you press - the squarish ones with numbers and letters and symbols - those are the keycaps. The keycaps are what your fingers press against when you type. Thus, they get far dirtier than other parts of the keyboard. Mechanical keyboards have large keycaps, which make them popular with gamers.
Switch
Switches are smaller pieces of circuitry that sit in between the key matrix and the keycaps. Each keycap has a switch underneath. Whenever you press down on a keycap, the keycap pushes the switch against the key matrix. The contact completes the key matrix circuitry and allows for an electric current to flow.
Switches use small springs to “bounce” back into position after you press down on them. The hyper-responsiveness of the spring mechanism makes mechanical keyboards popular with gamers. You shouldn’t disassemble the switches, but you may need to clean the top of them if you have a very dirty keyboard.
Plate
The plate is the outer shell that encompasses the key matrix and switches, and keeps the keycaps in place.
Keyboard cleaning supplies
Here are a few of the supplies you’ll need to clean your mechanical keyboard:
1. Cloth
2. Microfiber cloth
3. Small brush with sturdy bristles or a Q-tip
4. Vacuum cleaner
5. Small bowl
6. Flat head screwdriver or keycap puller
7. Sterilizer (denture tablets or dish soap will work)
Optional: Ultrasonic cleaner
Light cleaning a mechanical keyboard
You should give your keyboard a quick clean once per week. All you’ve got to do is wipe down the surface of the keyboard a couple of times:
1. Wipe the keyboard with a damp microfiber cloth.
2. Dry the keyboard with a separate, dry cloth.
3. Wipe the keyboard with a disinfectant wipe.
Doing this simple task just once a week will go a long way in preventing buildup of dust, dirt, grime, and germs. If you give your keyboard a light, weekly turn, you won’t have to deep clean it as often.
Deep cleaning a mechanical keyboard
You’ll have to deep clean your keyboard if the keys are blackened by dirt, or if the keys “stick” when you press them, or if your keyboard is suffering from slow responsiveness.
Deep cleaning requires you to disassemble parts of your keyboard. If you’re unsure of where all the parts go, take pictures as you take it apart so you’ll remember how to put everything back in place.
To deep clean your mechanical keyboard:
1. Unplug your keyboard
2. Vacuum the keyboard
Use either a handheld vacuum cleaner or your vacuum cleaner’s hose. Slowly vacuum over each of the keys and the spaces between them. This will remove the top layers of dust and loose dirt.
3. Remove the keycaps
Many PC users dread removing the keycaps. Removing them may require using leverage and force - which makes users afraid that they’ll accidentally break something.
If you don’t feel comfortable removing the keycaps, don’t. Leave them on and clean them exactly like you would clean the switches. Remember, though, that mechanical keyboards are designed to have their keycaps removed.
Remove the keycaps with a keycap puller or a flat head screwdriver. If you’re using a flat head screwdriver, just insert it into the space at the edge of the keycap and leverage it out. If a screwdriver is too large for your keyboard, you can use a bent paper clip.
4. Clean the keycaps
Place the keycaps in a small bowl. Fill the bowl with warm water, and then add sterilizer (dish soap or 2 denture tablets). Let the keycaps soak in the sterilizer for 6 hours.
Rinse the keycaps when they’re finished soaking. You should be able to easily remove any remaining dirt or grime with a small brush (a toothbrush works perfectly).
If the grime is sticky and can’t be removed with excess brushing, you may need to wash the keycaps in an ultrasonic cleaner. An ultrasonic cleaner is a small machine that vibrates water at high frequencies to blast away dirt and grime. Most of the time, an ultrasonic cleaner is unnecessary. You’ll only need it for the dirtiest keyboards.
When you’re done rinsing the keycaps, set them out to air dry. Don’t use a paper towel to dry the keycaps. Paper towels leave small particle residue and they can cause scratches.
Pro tip: Keycaps may take a while to air dry. It’s important that the keycaps are 100% dry before you place them back on your keyboard. If they aren’t, you risk serious damage to your keyboard.
5. Clean the switches
Clean the switches while the keycaps are soaking.
Vacuum over the switches to get rid of dust and dirt that has sunk past the keycaps. Use a small brush or Q-tip to scrape away grime that’s on or around the switches.
Use a damp cloth or cotton swab to wipe the spaces in between switches - try not to get the switches moist.
6. Reassemble your keyboard
When the keycaps are dry and you’ve finished detailing the switches, put the keycaps back on. They should easily pop back into place. You’re done! You now have a clean, pristine keyboard!
How to clean a membrane keyboard
The difference between a mechanical keyboard and a membrane keyboard is that the keycaps on a membrane keyboard press down upon a rubber dome instead of a switch.
In a mechanical keyboard, the keycaps are attached to the switches. But on a membrane keyboard, the keycaps are not attached to the rubber domes. They’re attached to a separate, removable plate.
To remove the keycaps, you’ll have to remove the entire keycap plate first (you’ll most likely need to use a Phillips screwdriver). After you’ve removed the plate, then you can pop out the keycaps for cleaning.
When you remove the plate from the keyboard, you might be exposing the key matrix. Be careful not to mess with the key matrix! Keep the bottom half of the keyboard somewhere where it won’t get damaged or dirty.
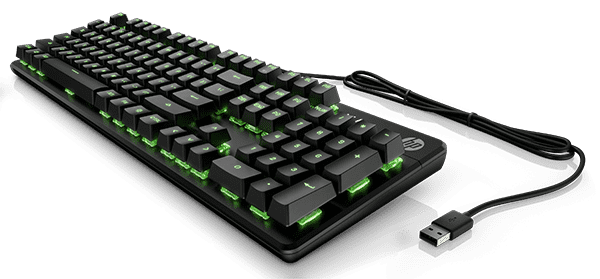
Mechanical keyboards from HP®
HP® produces a variety of mechanical keyboards that are built specifically for PC gaming.
The HP OMEN 1100 mechanical keyboard is equipped with ultra-responsive mechanical switches, including N-key rollover for anti-ghosting. The keyboard glows red to keep you from miss-keying, and the W-A-S-D keys are painted in a contrasting red color to make your movement buttons easier to find.
The HP OMEN Sequencer mechanical keyboard uses optical mechanical switches that are 10 times more responsive than standard mechanical switches. Customize your arsenal with individually backlit keys. You can choose from up to 16.8 million RGB colors, all with unique effects. You can use the colors to segment your keyboard, thus improving the speed with which you find and access each key.
Now that you know how to maintain a mechanical keyboard, it may be time to add one to your gaming accessories arsenal.
About the Author: Zach Cabading is a contributing writer for HP® Tech Takes. Zach is a content creation specialist based in Southern California, and creates a variety of content for the tech industry.
Recent Posts