We use cookies to offer you a better experience. For more information on how we use cookies you can read our Cookie and Privacy Policy.
How to Partition a Hard Drive
September 05, 2018

Before your new hard drive can work properly, you will need to partition it. Your computer uses the hard drive in multiple ways, and for your operating system to function properly, a part of the hard drive must be sectioned off.
Many times, this can mean that your operating system will use the entire hard drive, although that can depend on what you’re using your hard drive for.
Thankfully, Windows makes it fairly simple for you to partition your new hard drive, and it can take just a few minutes to accomplish.
You can do this on most Windows operating systems, including XP, Vista, and Windows 7 on up.
Why should I partition my hard drive?
Partitioning can benefit your hard drive and your operating system in a number of ways.
If you have large files that you need to back-up on a regular basis or you need to split these files in order to help them fit on your computer, then partitioning can be especially necessary.
Also, your computer needs available hard drive space in order to load files and programs properly. If you’re running out of room on your hard drive and aren’t looking to upgrade your system, partitioning may be your best option.
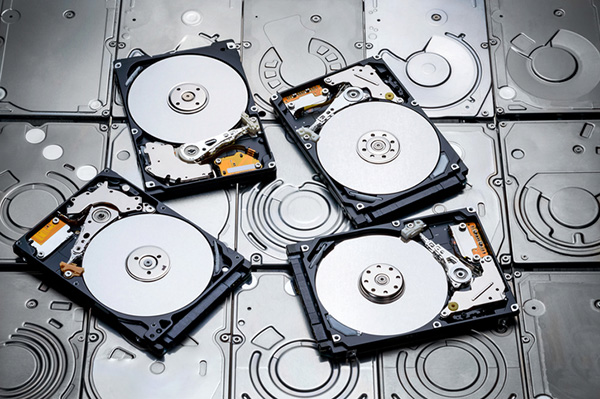
Which type of hard drive should I partition?
There are two main types of hard drives that can be partitioned, and it’s unlikely that you will use any other for your system.
Both magnetic-platter and solid-state hard drives can be used, and they aren’t difficult to install on your Windows operating system.
How do I partition my hard drive?
Windows makes it fairly easy to partition a hard drive on your own. However, if you plan to install a Windows operating system on your new drive, then you will not need to partition or format it.
When you are partitioning a hard drive, you are really preparing it for the files that will be stored on it. For an operating system, you should consider a clean install.
1. First, navigate to “Open Disk Management,” which is included in all versions of Windows
- If you have a later version, you will want to go to the Power User Menu
- For more advanced users, Disk Management can be accessed in the command-line
2. Once this is open, you will see a message that reads, “You must initialize a disk before Logical Disk Manager can access it”
- Don’t be concerned if the window doesn’t pop up; it does not necessarily mean that there will be a problem down the line
- For Windows XP, you will have an “Initialize and Convert Disk Wizard” prompt instead
3. You will need to choose which partition style will work best for your new hard drive after beginning the process.
- There are two options: GPT and MBR
- Choose GPT if your new drive is 2TB or bigger
- Choose MBR if it is smaller than 2TB
4. Next, find your new hard drive from the Disk Management window and select it. It will usually be labeled “Unallocated” if you have never used it before.
Note: If the drive is not installed correctly, then it will not show up and you will need to restart your computer and reinstall the hard drive. Then, follow the same steps to begin the partitioning process.
5. You will then have to decide how much space you want to partition and the volume you will need for your files and performance.
- Once you know which space you want to use, right-click and choose the “New Simple Volume” option for Windows 7 and 10, or
- “New Simple Partition” for Windows XP
6. Click next and then choose the size of drive that works for the file types you have and how much space you need
- A default size is usually chosen for you and is labeled “Simple volume size in MB.” If everything has gone correctly so far, you should see the same value in the “Maximum disk space in MB” field.
- If you choose this, then the amount you are partitioning will be the same as the total space you have set aside on your new hard drive.
- You can also have several partitions if you want. However, if you do create more than one, you should know that they will be considered as different drives within your system.
7. Once you decide how much you want to partition, click to the step that reads “Assign Drive Letter or Path”
- Your operating system will have likely chosen D or E as your drive letter, but you can change it to whatever letter you would like
- It’s very important that you select “Do not format this volume” unless you feel comfortable doing so.
- You will be required to format your drive later, but double check that what you inputted is correct and what you want before making that step.
8. You’ll then see the “Completing the New Simple Volume Wizard” window, where you can double check to make sure that everything looks right.
- Now, the partitioning process should be ready to start. After you have clicked “Finish,” your system will begin partitioning your hard drive.
- This process often only takes a few moments depending on your system, and your new drive will appear under the letter you previously assigned to it.
From there, Windows will ask you if you would like to format your new drive. Only newer operating systems such as Windows 7 and 10 have this option, and older ones will require you to format your hard drive manually.
Formatting can take much longer and be a bit more complicated, so it’s good to have a guide available to help you through the process.
Pro tip: It’s highly recommended that you do not choose options to “Perform a quick format” or “Enable file and folder compression.” Doing so can limit your new hard drive’s uses.
What about more advanced partitioning?
There are more options available for partitioning as well. Some include partitioning a part of the drive and making space for other types of files.
Before you run through the process above, you should have an idea of how much space you want for which types of files. For each partition that you create, you will need to format it before it can be used properly.
If you are also planning to replace a hard drive and restore your PC to factory settings, then you will need to format the hard drive that you partitioned while accessing the operating system installation method.
You’ll also need to restart your computer, after which you can insert the disks to reinstall the OS.
What if I want to remove partitions?
To remove your partitions, simply navigate to “Drive options (advanced)” and choose the “Delete” option.
You can also create or delete partitions at any time. Just be warned that you may lose files if they’re not backed up to another location. Double check to make sure your files are saved somewhere else before deletion.
Read our related articles for tips on freeing up hard drive space or alternative options like using cloud storage.
About the Author: Daniel Horowitz is a contributing writer for HP® Tech Takes. Daniel is a New York-based author and has written for publications such as USA Today, Digital Trends, Unwinnable Magazine, and many other media outlets.
Recent Posts