We use cookies to offer you a better experience. For more information on how we use cookies you can read our Cookie and Privacy Policy.
How to Install a CPU Water Cooler Unit in Your PC
March 06, 2019
Keeping your PC’s most vital components at their ideal operating temperatures is one of the best ways to improve stability and functionality. Thermal regulation prevents unnecessary strain during day-to-day tasks and increases your computer’s lifespan by cutting back on the accumulation of wear over time.
Traditional designs and most out-of-the-box configurations rely on air cooling systems that use a series of fans and ventilation ports to prevent the accumulation of hot air.
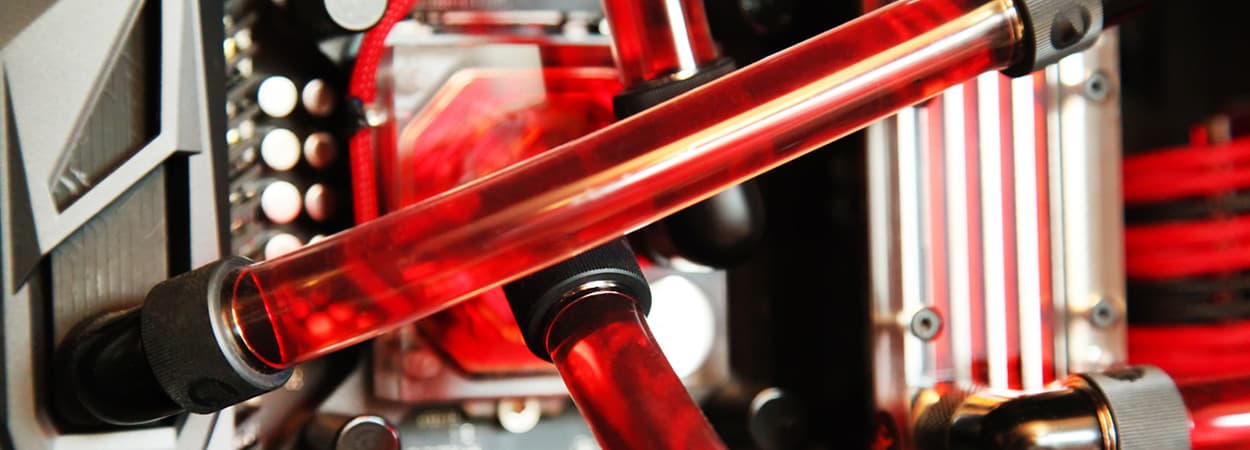
It’s time to consider water cooling for your computer
However, newer designs and custom builders have increasingly sought out computer liquid cooling as a more efficient alternative. The idea of incorporating liquids into your PC build may sound a little risky or potentially difficult to manage, but there are systems available that are intuitive and easy to use.
One of the best parts of shopping today’s market is the larger selection of affordable, self-contained units as opposed to more kit-based DIY builds.
What’s involved in installing liquid cooling in your computer?
Here’s a quick rundown of the basics of installing a discrete CPU water cooler unit, boiled down to just the most universal parts of the process:
- Check PC specs against potential liquid cooling unit to guarantee compatibility.
- Clear PC interior of anything that may obstruct installation.
- Remove PC’s factory fan assembly and heat sink protecting the CPU.
- Secure the radiator and fan assembly.
- Mount the accompanying pump on the CPU and ensure conductive elements are installed.
In this article, we’ll talk more about how liquid cooling works and then weigh in on some of the most significant ways it can improve your computing experience. We’ll also talk about different setups and how to decide which water cooling system is right your routine.
While many systems exist to cool entire devices or minimize ambient temperatures, we’re focusing on the targeted cooling of one of your PC’s most critical components: the CPU (central processing unit).
How does water or liquid-based cooling work?
For many users, the standard setup of a metal heat sink with a fan and ventilation to redirect warm air is an adequate way of preventing heat build-up and cooling the CPU. Because the heat conductivity of the sink’s metal material is greater than the air around it, a heat sink helps draw heat out of your PC’s active components. The fan then redirects the warm air away through the built-in ventilation ports.
Premium devices need extra cooling
That may not always be enough though, especially for those with a premium gaming PC or one that will be customized for more extreme graphics potential or processing capacity. In these cases, you may need a more efficient cooling system. With liquid cooling, that comes in the form of water and other substances with higher thermal conductivity.
To guarantee consistency, a pump uses a series of tubes to cool and circulate water through your device or within its own closed system.
But how does liquid actually keep your CPU cool?
The short answer: through proximity and ventilation. Even with a CPU liquid cooler your PC needs a comfortable flow of fresh air, so liquid-cooled PC systems typically include a fan or ventilation solution. With a closed system, your CPU transfers heat to the liquid cooling system through a heat conductive plate.
In essence, liquid cooling uses a fluid medium to diffuse heat while a radiator and fan direct it away from your computer’s most critical components.
The advantages of liquid CPU cooling
There are many different advantages to a water-cooled computer, from the basic premise of better temperature management to saving power and even space in your build or workspace.
1. Persistent cooling
For one, a liquid CPU cooler system offers the reassurance of a persistent solution rather than cooling that only kicks in when your PC and components are already too hot. For example, fans don’t run continuously.
This means that air cooling typically only regulates overheated components after they’ve actually overheated, rather than preventing them from overheating in the first place. Because liquid cooling is active all the time, your system is kept cool consistently.
2. Efficiency
Water cooling PC components also offer many advantages in terms of efficiency. With substantially customized builds, they typically accomplish more with less space than a setup with multiple fans or one that depends on outboard systems like cooling pads.
In parts of the world that experience higher temperature, the same benefits are even more pronounced while also reducing the ambient noise levels caused by additional fans.
3. The cool factor - literally
In addition to the aforementioned benefits, liquid cooling provides you with the opportunity to add a little extra color or flair to your system as they can often be outfitted with lighting and other features.
4. Serious support for gamers and overclocked configurations
Gamers will find that adding liquid-cooling to a gaming computer will also give them a substantial positive impact for the same reasons. Gaming and visually demanding tasks like 3D rendering and design demand a lot of your hardware, so liquid cooling has the potential to dramatically improve your experience when you’re running resource-heavy games or software.
If you’re considering overclocking your CPU, liquid cooling is a great way to protect yourself and your high-performance rig from the potential complications of bypassing factory output and stress settings.
Installing a closed-loop, all-in-one (AIO) system
While PCs with built-in liquid cooling and efficient thermal regulation are more common these days, including several models from the HP OMEN gaming desktop series, you can also install your own closed-loop liquid cooling system for your PC.
The installation process varies depending on your computer and the cooling system you purchase, but many of the basic steps are the same.
1. Size matters
With a closed loop system, you’ll first need to make sure that whatever system you’re considering can actually fit and function within your PC case. There is plenty of variety on the market, so always check the manufacturer’s specs before committing to a product.
2. Clear the way
Next, you may want to remove panels or internal components that may obstruct the installation.
3. Remove the old cooling system
From there you’ll need to unplug the factory CPU cooling system, typically a fan and heat sink.
4. Install the new system
In its place, you’ll install the pump. Then, mount your radiator and fan, generally in the same area as your PC’s existing factory fan assembly, and then secure the pump to your CPU. Liquid systems typically absorb heat directly through a conductive plate mounted between the pump and CPU.
Of course, the particulars will be different with each PC or CPU cooler, but adjust as necessary and leave room inside your PC case for other components. Also, make sure all of the mechanical and system connections are secure.
Although your personal setup may require other steps, this is the standard process for installing the typical closed-loop CPU cooler. Some newer designs may also include apps and management software.
DIY liquid cooling
A true DIY approach to liquid cooling is more challenging than a closed-loop AiO system for a variety of reasons, mainly the complexity and variety of components involved. You’ll need to be much more conscious of your PC’s specs and your chosen liquid cooling system so that you know the components are compatible before you begin.
You’ll also have to think about how you formulate your chosen liquid medium. Otherwise, the process is generally the same and depends on your PC, kit, and skill level. Part of the advantage of a closed-loop system is that you avoid most of the usual risk of leaks from installation error, and you don’t have to bother with the liquid medium yourself.
Do I really need a dedicated CPU cooler or liquid cooling?
The advantages of a liquid cooling system are substantial for anyone who wants more from their setup, especially those who want to push their PCs beyond their limits through overclocking.
The risk of overheating is a consistent threat for gamers, designers, and anyone who depends on heavy-duty software and complex operations. It may take a little extra effort to install, particularly as part of a complete DIY build. But a proper liquid cooling system can offer better and more consistent temperature regulation with a higher degree of CPU protection.
About the Author: Dwight Pavlovic is a contributing writer for HP® Tech Takes. Dwight is a music and technology writer based out of West Virginia.
Recent Posts